
Introduction
Important: Starting with version 4.0, VMware NSX-T Data Center is known as VMware NSX.
That’s important to note because when you google anything with NSX these days, you either get NSX-T documentation or NSX-v documentation. This post is about VMware NSX (Specifically NSX 4.1.0.2, but this should work on any NSX 4+ installation).
SFTP Backup Server
Deploy or re-use an existing Linux Server.
By default, Ubuntu Server supports SFTP. You do not need to configure anything extra.
However, I recommend two things:
- Editing the sshd config file and removing password authentication.
- Ensuring you have enough space to handle the amount of backups you want to store.
Of course, if you keep this server storing backups on the same infrastructure as the rest of your environment, you’ll want to either take an offsite backup of this backup server or copy these backups elsewhere.
vi /etc/ssh/sshd_config
Edit the line “PasswordAuthentication yes” to “PasswordAuthentication no”
# To disable tunneled clear text passwords, change to no here!
#PasswordAuthentication yes
PasswordAuthentication no
Create a user account for backups
sudo adduser nsxbackups
Give it an appropriate password.
Since I’ve used a purpose-built VM just for these backups, I don’t need to get picky about the location of the backup files. Hence I’ll just place them in the home directory of my nsxbackups user.
mkdir nsxbackups
Finally, we need to use OpenSSH to generate an SSH key for this server. It’s important to note you *must* use OpenSSH. Do not use PuTTyGen to generate an SSH key. NSX Manager will not like it and you’ll be left scratching your head as to why. Ask me how I know…
Since I prefer to use ed25519 keys, generate an OpenSSH ed25519 key as below:
ssh-keygen -t ed25519 -C nsxbackups
You will be prompted where to save the SSH key pair. Name it appropriately.
Generating public/private ed25519 key pair.
Enter file in which to save the key (/home/nsxbackups/.ssh/id_ed25519):
Now that you’ve generated your SSH key pair, copy the public key string into your .ssh/authorized_keys file in your nsxbackups user. Example below - but obviously use your own ssh public key.
nsxbackups@nsxbackupserver:~$ cat .ssh/id_ed25519.pub
ssh-ed25519 THISISANexamPLEOnLyabc123123123d+nsSRc5wukispSLdOFkcCQ14hMmw nsxbackups
Add that line to your .ssh/authorized_keys file
$ cat .ssh/id_ed25519.pub >> .ssh/authorized_keys
Finally, list out your SSH Private key
$ cat .ssh/id_ed25519
You should be presented with something that looks like this example. You’ll want to keep this for reference later.
$ cat .ssh/id_ed25519
-----BEGIN OPENSSH PRIVATE KEY-----
b3BlbnNzaC1rZXktdjETHISISMYSSHPRIVATEKEYothersmayhaveansshprivatekey,butthisoneismine.Ilovemysshprivatekey/kalhdfasdfLK:HflkjahfkJHFjkhasadfjSJDeITJsA
AAAEAEko+YmWmTXVgkGpuhtzR7dMR473Blup5iz0n1Yxxe9Bf99VKddMe4kV/d+nsSRc5w
ukispSLdOPurpleMonkeyDishwasherMyZC15eXotYmFrLTAxAQIDBAUGBw==
-----END OPENSSH PRIVATE KEY-----
Now your SFTP server should be ready to go to set up VMware NSX backups.
Configure NSX Backups
Log into your NSX Manager and go to System -> Lifecycle Management -> Backup & Restore
Click Edit

Viewing VMware NSX Manager Backups
From here, enter the FQDN or IP address of your NSX Backup Server. Leave the port default. Enter the directory you created earlier and enter the username.
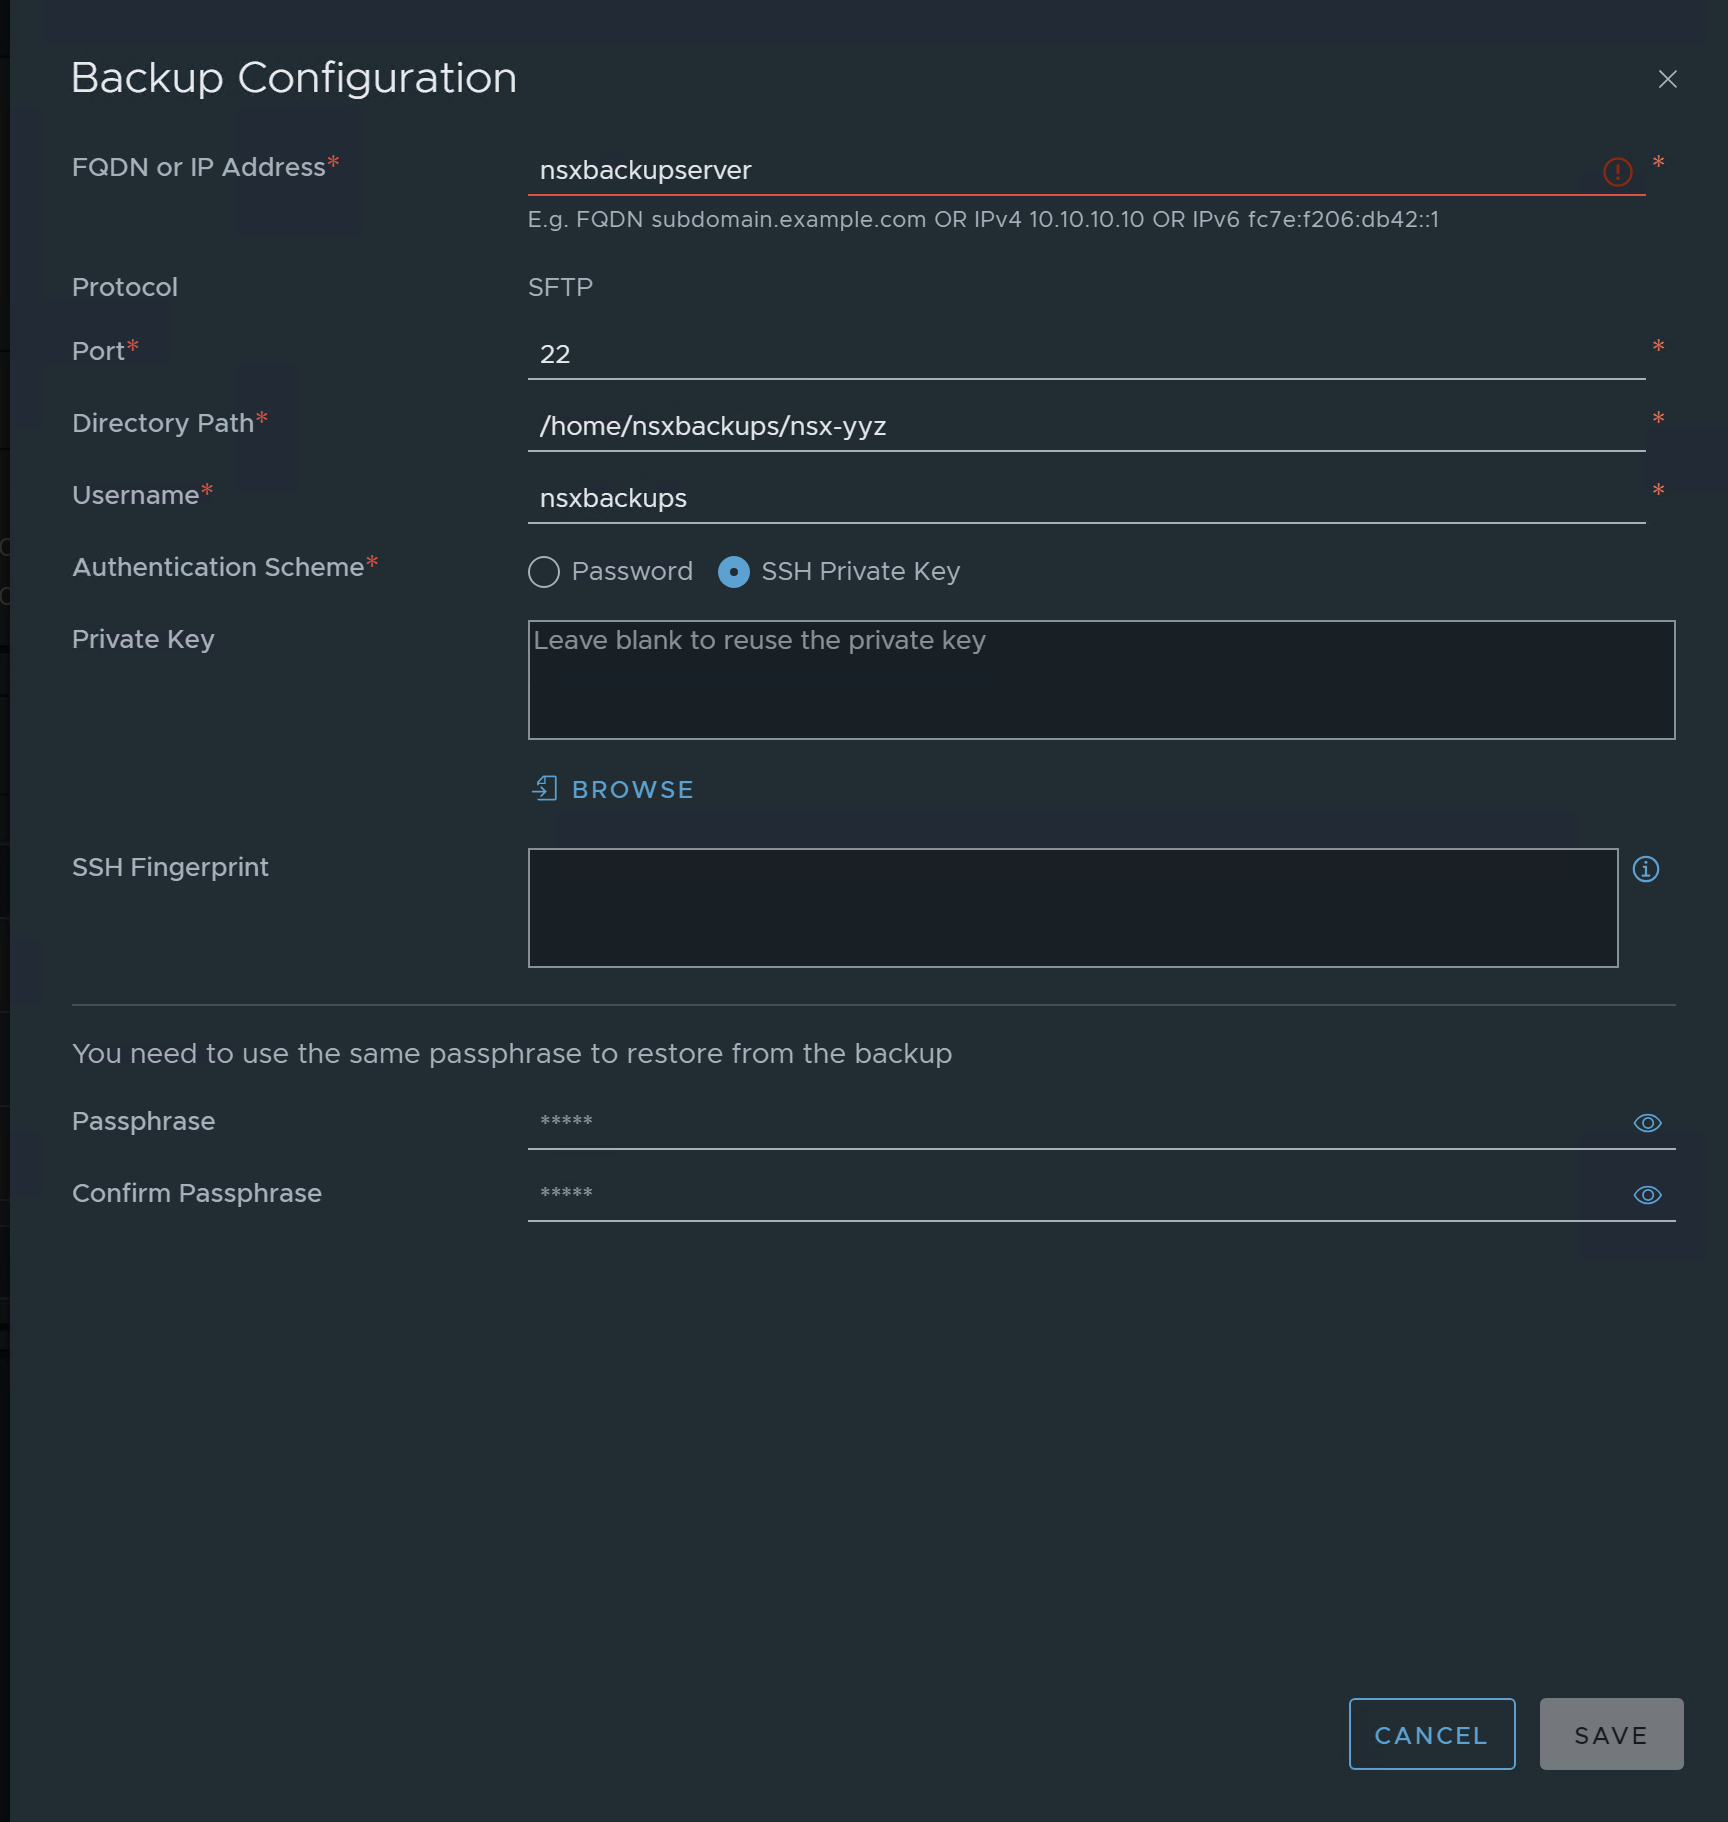
Configuring VMware NSX Manager Backups
The SSH Key is where you may get hung up - its where I got stumped. If you followed the guide above, you’re fine. If you decided to use a PuTTy key, well, you’re going to be SOL.
Enter the key as you see it from the screen above. Copy the entire section, including the BEGIN and END sections.

VMware NSX Manager Backups - Private Key
Make sure there is a trailing carriage return. Also, ignore Grammerly’s suggestions.
Finally, enter a passphrase for encrypting/decrypting the backups. KEEP THIS PASSPHRASE, or you will be SOL to restore your NSX appliance.
Click Save and if all goes well, you’ll be back to the Backup & Restore main screen. If you get any errors for the private key or authentication, double-check to make sure you have the public key in the authorized_keys file, and make sure you have copied/pasted in the appropriate private key. If you think it may be the private key giving you issues (it might be!), SCP the private key off your NSX backup server using something like WinSCP and upload it to the GUI using the browse button.
Don’t forget to schedule your backups! Set whatever backup configuration interval you would like.
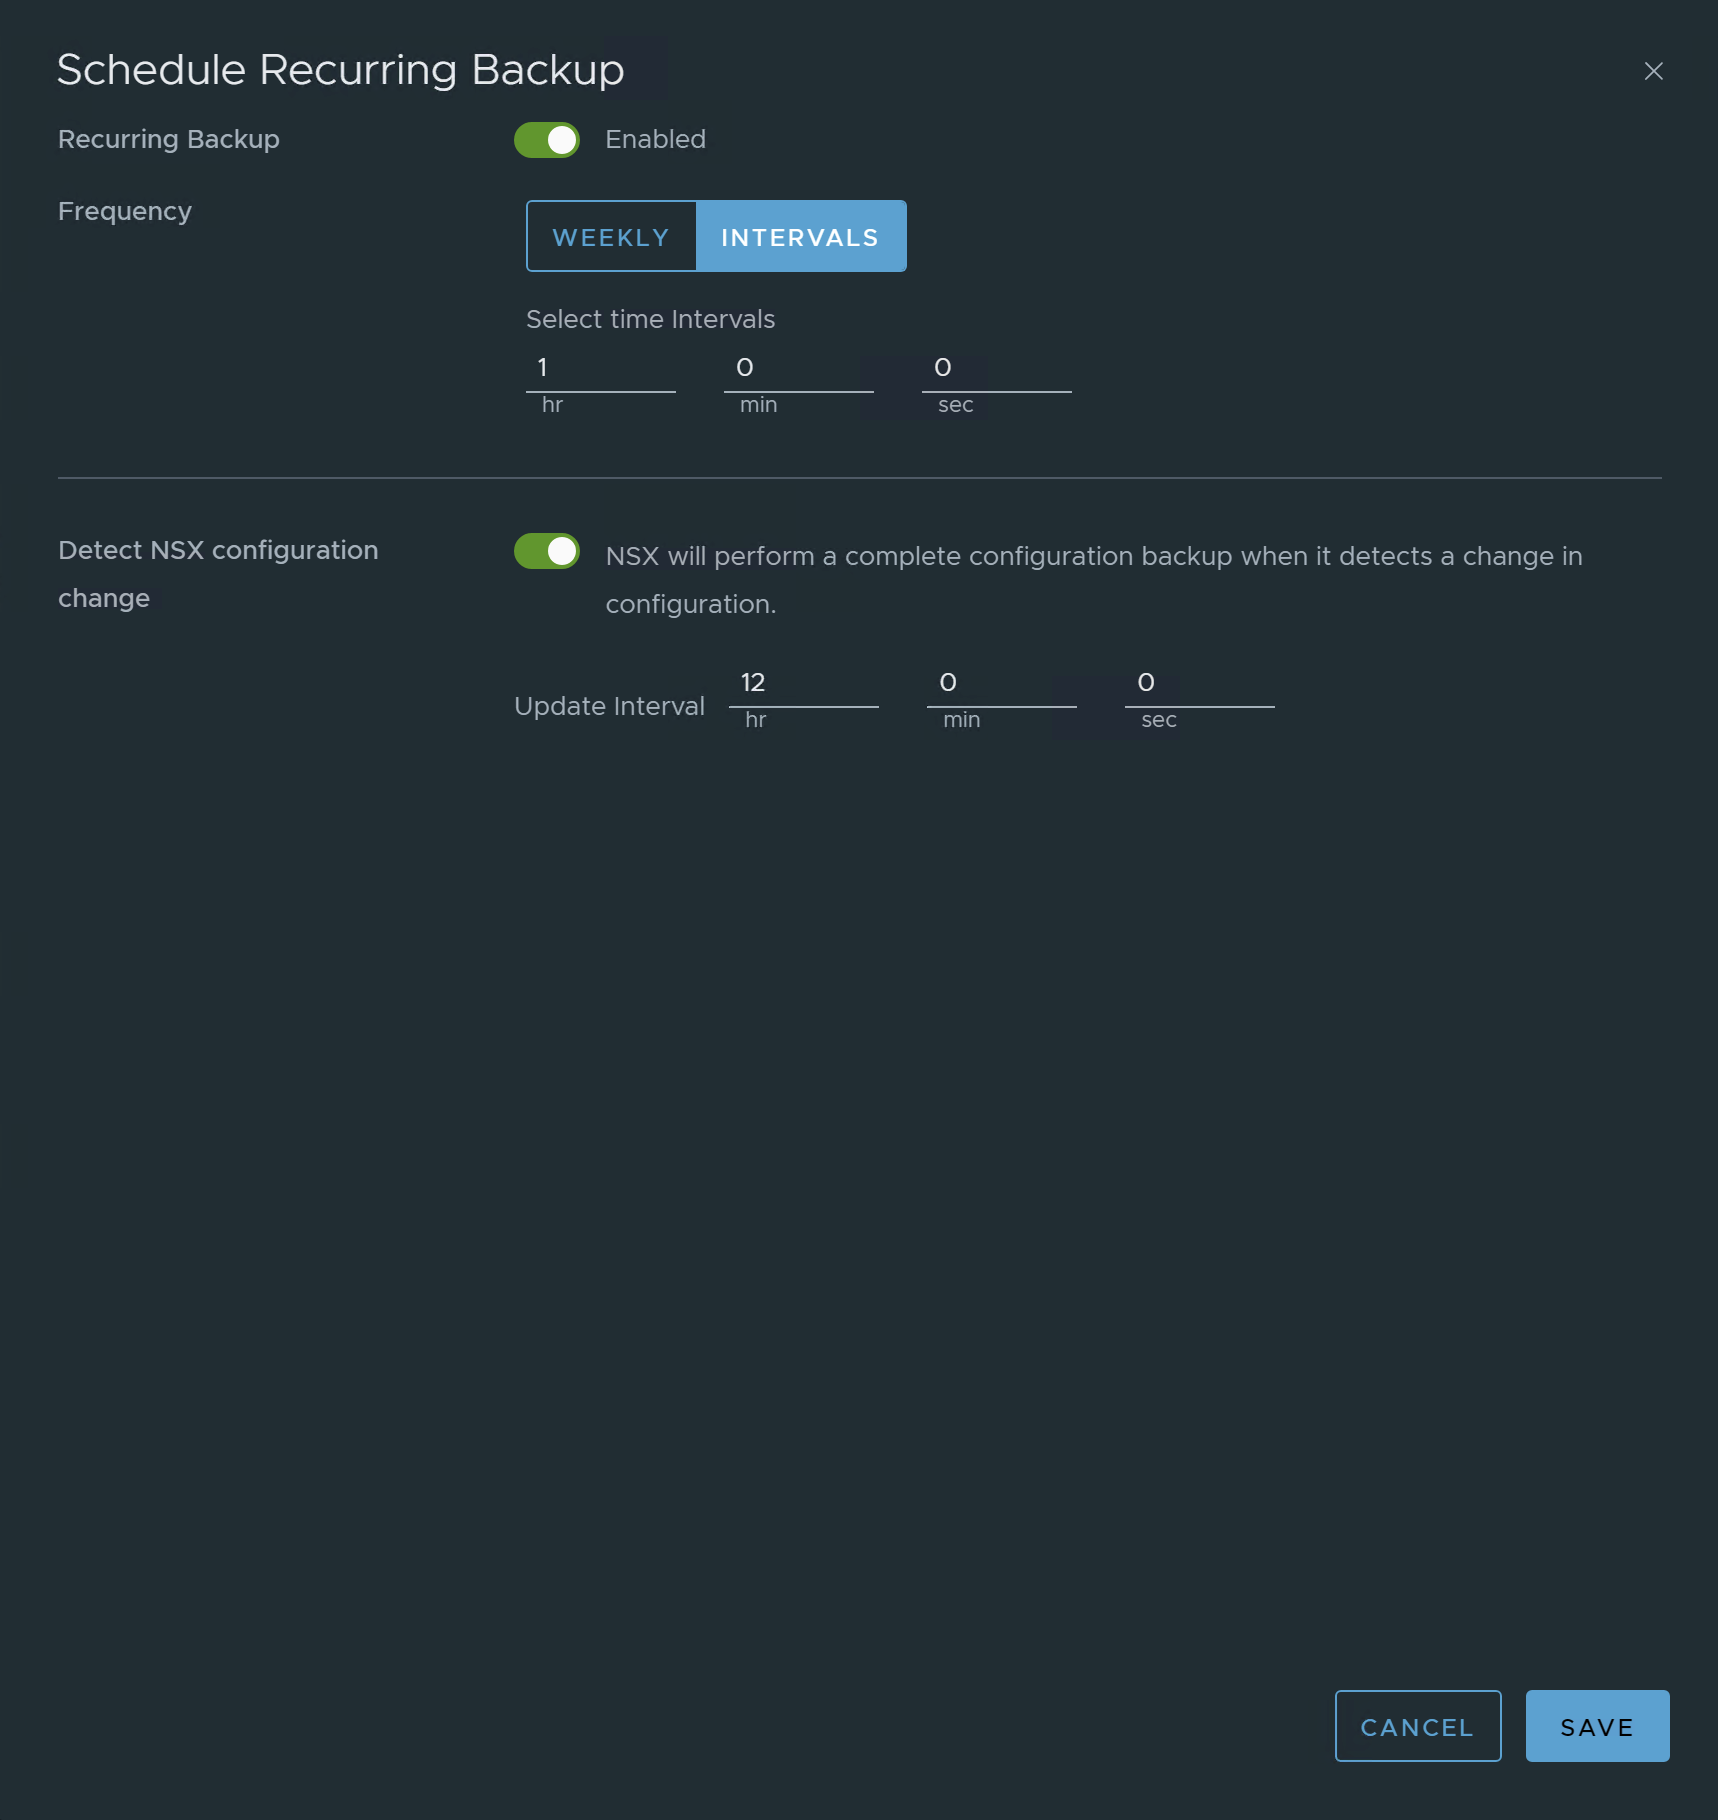
VMware NSX Manager Backup Schedule
Configure NSX Backup Retention
This one is a bit irritating. NSX Manager Backup & Restore has no built-in way to manage backup retention. This means your backups will run until your NSX backup server is out of space. Nice.
However, VMware does provide a script you can run to clean up older backups. You just have to configure this manually.
SSH into your NSX Manager and browse to this location:
/var/vmware/nsx/file-store
Inside that location is a nsx_backup_cleaner.py file. You’ll want to copy that file to your NSX Backup Server. I copied it just by copy/paste. You can probably do it better. Name the file the same in your backup server. I stored mine in:
/home/nsxbackups/scripts
Now, because this is a Python file, you need Python installed. Luckily Ubuntu 22.04 has python3 pre-packaged. If you chose a different OS, YMMV.
You do not need to edit any settings in the config file itself, but you may want to edit it and read it anyway for a few extra tips.
To run it, either run it manually (boring!) or schedule a cron job to do it for you.
crontab -e
I set my schedule to run at 10:30 AM every day. Mine is set to keep 3 days, but at least 24 backups. You can retain as many backups as you see fit. I intend to further back up this server using another backup product (such as Veeam), so I do not need to keep long term retention on this server itself.
30 10 * * * python3 /home/nsxbackups/scripts/nsx_backup_cleaner.py -d /home/nsxbackups/nsxbackups/ -k 3 -l 24
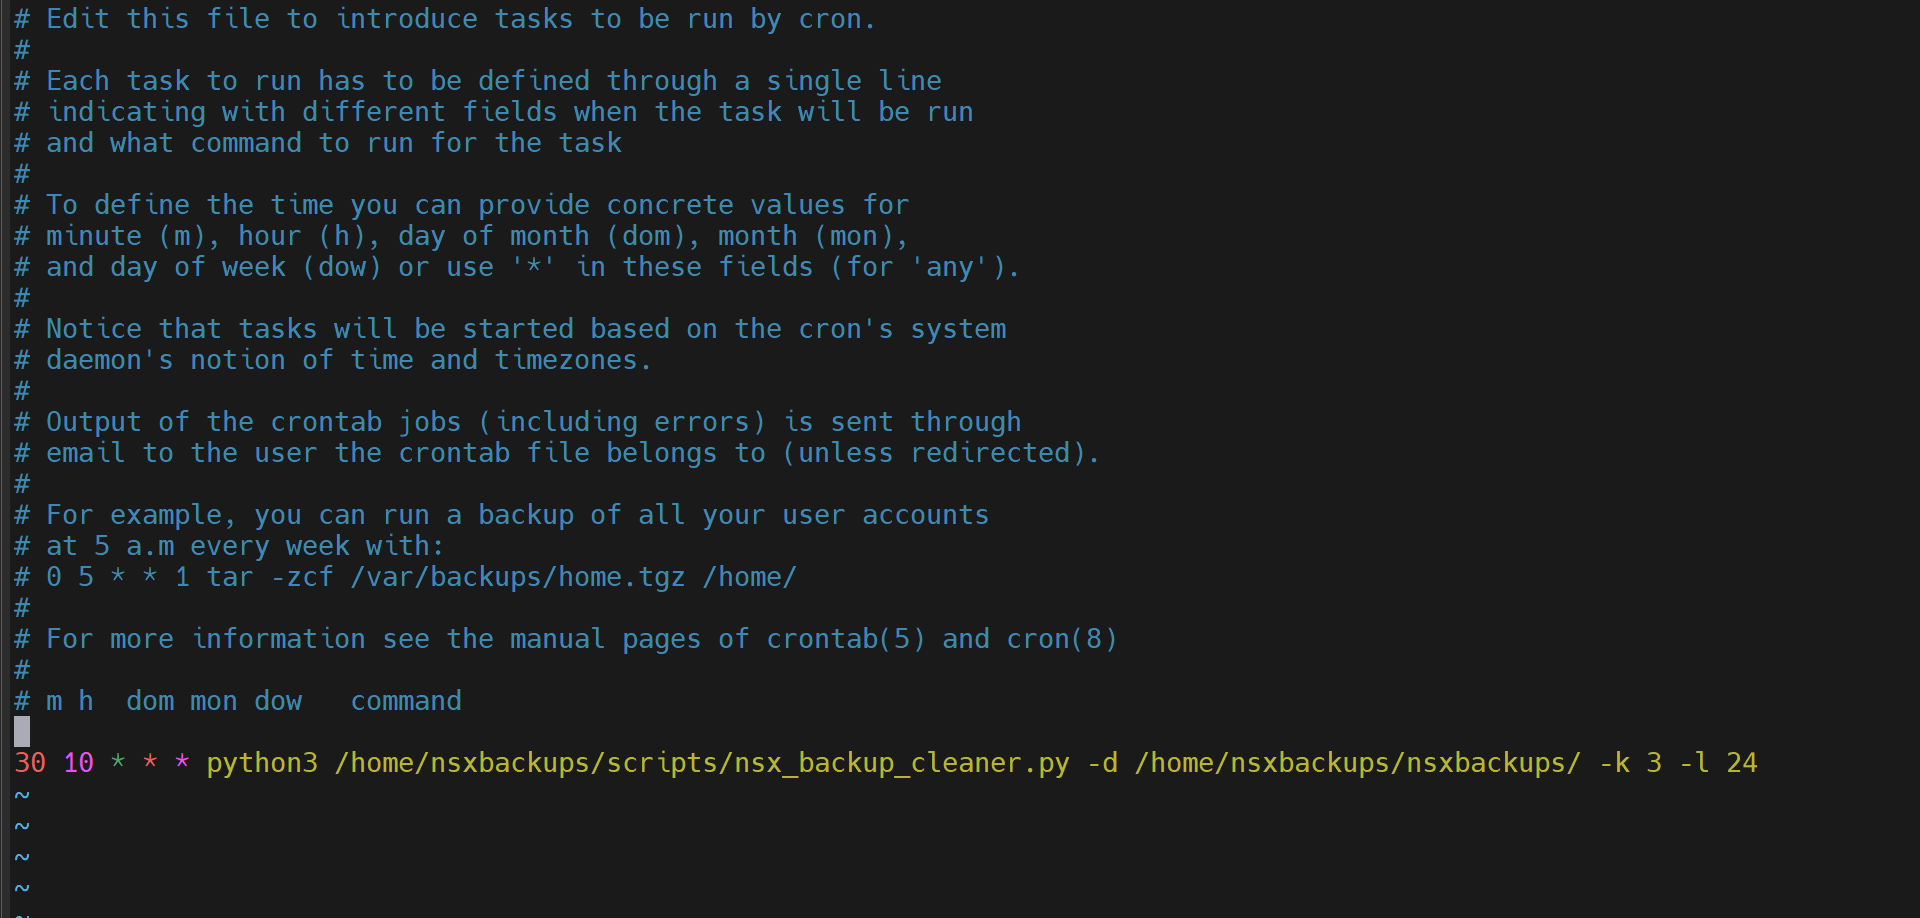
NSX Backup crontab configuration
If you want to run the script manually, run it via the same command as you see above.
python3 /home/nsxbackups/scripts/nsx_backup_cleaner.py -d /home/nsxbackups/nsxbackups/ -k 3 -l 24
That’s it! You’ve now configured your backups to run regularly and importantly, prune the old backups automatically.
Conclusion
Backing up your NSX Manager using SFTP is the recommended and approved way to perform VMware NSX backups. Using SSH Keys to configure your NSX Manager Backups gives that added security over password-based authentication, and if we’re talking about a critical infrastructure component such as VMware NSX, you want this to be as secure as possible!
For more information, check out VMware’s documentation: